There are many occasions when we want to take a screenshot, either to be able to display easily visible information on our desktop, to capture an error message, or even to do a tutorial of all the steps to be followed using images.
With that in mind, we can use different methods depending on the type of capture we need to do. Now, we are going to show you all the ways to take screenshots in Windows 10.
the best and popular method is keyboard shortcuts, however, when you need to take more advanced screenshots, you will not be having a choice but to use certain third-party applications like the ones shown below.
It may also happen that your keyboard does not have that famous Print Screen key and we have to find a solution. Don’t worry, there are and we are going to explain them to you.

There are mainly two options for taking screenshots in Windows 10: that you use Windows‘ own methods to take screenshots (both the application installed by default and the typing shortcuts that you have been using for years and years) or that you use programs external software that allow some ‘extra’ functionalities or that help us to make the capture more complete.
Table of Contents
Windows keyboard shortcuts

We can use keyboard shortcuts in Windows to take screenshots. Once you press the keyboard keys, the capture will be made and then we will have to paste it into an image editor.
You have done it many times and it is one of the most common ways that we use or faster. You touch the corresponding keycode on the keyboard, go to Paint or any image editor you have installed, and just do Ctrl + V or touch the right mouse button and choose “paste”. The screenshot you have taken on your computer will automatically appear.
The three shortcuts for capturing in Windows 10 are:
Print Screen.
Alt + Print Screen
Win + Impr Pant
Win + Shift + S
In all cases, we have to press the keys at the same time if there are several.
Print Pant
The first, Impr. Pant. , it simply consists of pressing the Print key. Pant. of our keyboard. It takes a screenshot of everything that is seen on our desktop.It is as if we took a picture of our computer screen.
And also, the capture is automatically saved to the clipboard, so later, we will have it available to paste in any image editing tool or directly to email a document, etc.
Alt + Print. Pant
The second of the keyboard shortcuts, Alt + Impr. Hose. , allows us to take the screenshot of the active screen in Windows 10. If we are using two screens, this key combination will only capture the screen used.
Moreover, it can use to capture the window that is currently focusing on our desktop. Even if other windows are open, only a screenshot of the active window is taken. In either case, the image is also saved to the clipboard in both cases to use it however we want.
Win + Impr Pant
If we take a full-screen capture and want to send the image to a folder on our hard drive for storage without opening an editor and then inserting the capture and then saving the file, we are interested in the Win + Print Screen keyboard shortcut.
Win + Shift + S
we can find the keyboard shortcut Win + Shift + S, a combination that allows us to use the new Crop or Snip & Sketch and Annotation tool.
The effectiveness that Microsoft incorporates into Windows 10 proposes as an alternative or substitute for the popular Snipping Tool, but that nevertheless, the two continue to coexist in the system.
To use it, you should press the key combination Win + Shift + S . As we do this, we can see how our screen will darken, and specific icons will appear at the top and we can see, from each one of them, we will be able to make a cutout of the area of the screen that we want by selecting it with the mouse. However, it allows us to make a window cutout, full screen, or freeform cutout.
Snipping Tool or Windows Snipping Tool

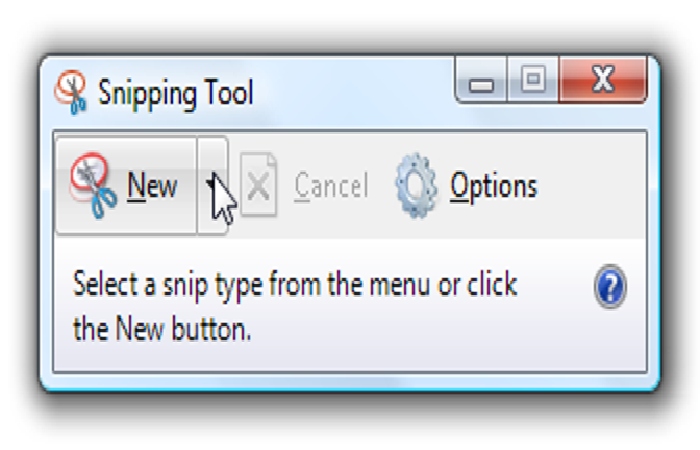
The Snipping Tool or Window snipping tool has been around since Windows Vista, and it has disappeared from Windows 10 after the arrival of Snipping and Annotation, the truth is that we can still use it.
It may be too easy for you, but it is the most comfortable option if you always have the Cutouts at hand and do not need anything incredibly complex or elaborate. you have to press a button to do it, and on it, you can cut and save. In addition, it allows us to choose the format and even activate a timer.
It is a utility that allows users to take screenshots straightforwardly. Snipping tool has other exciting options such as taking full-screen captures, window clipping, free or rectangular shape, annotating on the captures, or even establishing a delay time for automatic screenshots.
It is effortless, and you have to use the settings on the top bar to sleep, switch between modes, etc. When you want to take a screenshot of that movement, tap on “New.”
One of the main advantages is that it has four modes, and one of them is ” free form” This means that you will not take the classic rectangular screen capture that you will have to edit later, but rather capture the screen.
Without leaving the application, you can select, freehand, what you want to save as an image and whatnot. It also offers us a window clipping mode that automatically detects the programs you have open and chooses between both without having to bother with trimming manually. Comfortable and fast.
Timer
One of the advantages that the Windows tool allows us is to activate a timer that will cause the screen capture taken automatically when one second, two seconds, three seconds, four seconds, or five seconds pass.
When those seconds pass, the capture will automatically skip, and we have to cut or choose what we want to save.
So you will not have to be aware of hitting the button but you can get a drop-down menu to capture, for example or a series of options.
How to always have it at hand
To use Snipping, we have to type its name in the search box on the Windows 10 taskbar and click on the application in the results list.
Screenshots made by Cutouts automatically save to the Windows 10 clipboard. The user can also pin the application to the start bar to always have it at hand when you need to take a screenshot.
The best screen recorders for Windows 10
ShareX, one of the most complete programs
ShareX considers being one of the best programs for taking screenshots in Windows 10. It’s free and open source.
It allows us all kinds of tools and options both when creating the recording and when editing, sharing, and uploading it to the web.
ShareX automatically enables us to share them with other services such as Box or Dropbox. It also allows us to edit the image ourselves, add a watermark …
It’s a free program that you can download from their website that allows us to choose any type of design in the shot: round, square, freehand. We can underline, add text, pin pins, highlight, etc
LightShot
If you are looking for simplicity, few problems, and multiple options, LightShot is your screen capture application. It is one of the top-rated and most widely used programs at the user level. We can use it quickly and efficiently. To start, we press the record button and then select the section to cut.
There are basic editing options such as arrows, pencils, boxes, inserting text, or applying fills. Via the menu, we can also upload them to the cloud, search in Google, share the picture in networks … Of course, we have the option of saving, copying, or printing the edited recordings.
PicPick
It is another highly recommended option. This program offers a suitable recording method combined with exciting possibilities.
In addition to these most basic and necessary utilities, we have a protractor, a ruler for measuring pixels, and complete color palettes with their codes. We can also create a blank page with its full editor in addition to the pages we have saved.
But one of its great points is the wide variety of shots we can take from full screen and active windows via window sliders or fixed areas. We can even take handheld shots or repeat the last one.
Related Searches For How To Take The Screenshot On Windows
[how to take screenshot on windows 10]
[screenshot on windows 10]
[how to take screenshot on windows 10]
[how to screenshot on pc windows 10]
[how to screenshot on windows 10]
[how to take screenshot on pc windows 10]
[how to screenshot on windows 10 laptop]
[how to screenshot on hp laptop windows 10
[how to screenshot on hp laptop windows 10]
[take screenshot on windows 10]
[how to take a screenshot on a dell laptop windows 10]
[screenshot on pc windows 10]
[how to screenshot on windows 10 laptop]
[how to make screenshot on laptop windows 10]
[how to take selected screenshot on windows 10]
[how to make a screenshot on windows 10]
